Yup, that's me again... dealing with some new pain in the neck and then writing about it.
And this time let me tell you a few things about mutable infrastructure or even more specific, how to build your own using Packer and AWS.
So, for the past 2 years or so I have been working in an amazing company where I lead the Automation Infra team. A team of awesome and super talented all around infra developers that basically maintain the entire QA Guild's infrastructure including automation, pipelines, custom AWS resources and much more.
In the scope of our work, dynamic EC2 instances are heavily in use for various deployment and automation needs. The need for dynamic mutable infrastructure is a very common need and in the era of cloud providers and various open source and commercial solutions we are able to address that need effectively.
So, What is Packer?
Packer is an open-source tool for creating Machine Images from source configuration developed by HashiCorp. (And if you are in the operations game, that name would ring a few bells for you for sure).
An AMI or Amazon Machine Image can be looked at as a snapshot/template from which we can spin up as much identical servers as we need.
So, imagine the following scenario...
You need to be able to deploy dynamic, custom configured servers that you can spin up on-demand in your cluster. These servers are needed in order to run a certain type of application code on it.
For that code to be able to run, the server needs to be configured and provisioned to allow the necessary ecosystem for the application.
To make it easier to understand (And since we are in the automation game here) let's say that we need to deploy a Selenium Grid server as an example.
So, what do we need for this Grid of ours to run?
We would need:
- A machine with an operating system.
- Configured Networking / Firewall / Proxy to allow inbound and outgoing connection settings.
- Java installed and JAVA_HOME configured.
- Selenium Standalone Server downloaded.
- A correct version of browsers downloaded and installed.
- The correct browser drivers downloaded and referenced in the PATH for easier access.
- A config file hosted on the machine to use for launching the server with the desired configuration.
So, how would you manage this task?
Well, one way would be to spin up a server, ssh to it and start installing and configuring everything you need manually or with a provisioning script.
Now, thats all fun and games when you have only 1 of these servers that needs to be available and you are working with a single static instance. But, what if you need 10 of these babies? or 100? what if you don't need this kind of scale up and running 24/7 and you want them to be dynamic?
Another typical real world problem would be that you have that machine up and running for a while now, and a vulnerability is discovered in the browser version you are using. So, now you need to upgrade the browsers and drivers in all 100 instances, or let's say you are performing an upgrade and now you need a different Java or Selenium server version. How would you solve these problems on a scale?
Here is where an AMI comes into play.
Packer allows us to build our own Images and deploy them to a cloud provider of our choice (Amazon, Asure, DigitalOcean, GCP etc...).
We can later on deploy as many identical servers as we want from that Image. We can manipulate and change our servers according to our needs any time we want by building a new Image, deploying it to the cloud provider, killing running instances and deploying new ones from that new AMI. (And if you plan your cluster correctly without loss of traffic or a downtime).
But enough with the chit-chat, let's see what this packer thingy is all about...
Packer installation on MacOS
In this blog-post I will stick to installation on a Mac, and one of the easiest ways to install packer would be using homebrew.
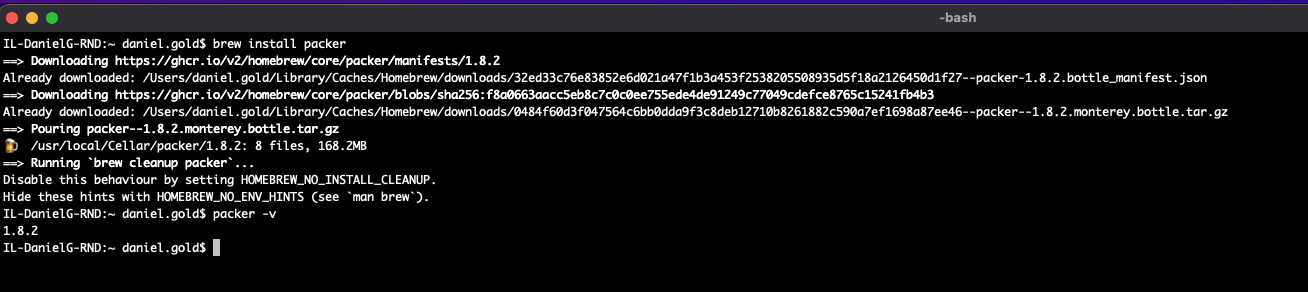
To get packer installed on your Mac just open up a terminal and run: $brew install packer
Creating our first project
Now, let's create our Packer project.
First, I will create a folder on my desktop which I will obviously later on push to Github as any other source code repo I have. I will call our project "Packer-example".
Next, we will open our project in a code editor and start working on it. I am going to use IntelliJ as my IDE of choice, but you can use what ever editor you feel comfortable with.
The first thing you need to know is that Packer uses .json format configuration files.
The first thing I will do is to add a .json configuration file to my project. I will call it:
my-first-ec2.json
This configuration file is going to define how my machines are going to be built.
Now, we are going to look in the Packer documentation as our main reference (And by the way they did a great job with their documentation all across their projects).
packer.io/docs.
Next up, what you need to know is that there are 3 main components to a Packer .json configuration file.
- Builders
- Provisioners
- Post-Processors.
For this basic example we will only use Builders and Provisioners.
Builders:
As mentioned in the docs, Builders are responsible for creating machines and generating Images from them for various platforms. Builders are an Array in the json configuration file because we can have many of them for deploying across multiple platforms. I will focus on creating an EBS backed instance (Which you can also find in the
docs).
I will copy the builders template from the docs and add it to my configuration file like so:
Since we are focusing in this blog-post on deploying to AWS, and we chose to deploy an EBS backed instance we are going to specify that in our configuration file according to the documentation.
If we take a look at the "Required" section in the Access configuration for AWS, we will see that there are also several mandatory configurations that we need to specify: access_key, region and secret_key. A general mandatory field is also an ami_name. So let's add these too to our config file...
One things worth mentioning here is the big no-no of storing secrets in a git repository. As you can see in the above screenshot I just explicitly put them in the configuration file but in a real-world scenario I definitely would not do that.
The next 2 required things we would need for our Builder is a source_ami and instance_type.
The source AMI would be the base layer of our Image and would allow us to gain an operating system on our freshly created server. It can be a custom AMI that we build or we can chose one of the available Images in the default AWS marketplace. For this example I am going to use an ubuntu base AMI from the marketplace.
The instance type would be the type of the machine itself that we would like to create from the variety of types available.
In our example I will use a small instance type t2.small.
Now, all I need to do is copy the base AMI ID from the marketplace and add it to my configuration and same goes for the instance type.
We will also need to provide our configuration file with the ssh user suitable for our instance. For ubuntu that user would be "ubuntu". So let's add that as well. (Why this is needed will be explained in the "Behind the scenes" section).
Provisioners
So, as you probably understood by now, what we built in the Builders section for now is just a pointless AMI template. In the real world we need to provision our server to get it ready to run real world applications. So, we will jump to the Provisioners section in the docs and add the template to our configuration file.
The Provisioners section is also an Array. What needs to be specified is the type of the provisioning we would like to do. So, we need to create our provisioning script and point our provisioner to use that bash script file.
I will call our provisioning script script.sh and add it to our project.
In that script we can put what ever we want in order to provision our ubuntu server. For example we can enable Universe repository, update apt, install ec2 connect for AWS, download and install software etc...
Ones we have our script ready lats pass in the location of the script and the provisioner type into our configuration file as mentioned earlier:
Behind the scenes of how packer works
This is a good time to mention the following about the way packer will built our Image.
Ones we build our project, Packer will spin up a server in AWS according to all the configurations that was specified in the config file, and provision it according to what we will direct it to do. Then, it will create a "Snapshot" from that server which will be our AMI, then it will terminate the temporary instance and store the AMI in the appropriate AMI section in the AWS console.
Well, Ones that's all said and done, I think we are ready to create our very own AMI!
To build our project all we need to do is to open a terminal and navigate to our project folder. Then, we will run: $packer build <config file name>
As you can see, it spins up an instance, creating an AMI from it and storing it.
Now, if we go to our AMI section in the AWS console we can see our freshly built Amazon machine image ready to use.


Hi daniel, why did you stop posting? How are you?
ReplyDelete