Sharing is caring - Intro to Jenkins shared libraries

In this blog post, we will talk a bit more about the practice of infrastructure as code, its relevance to test automation, and how you can avoid code duplications, align with industry best practices, and enable velocity, maintainability, and collaboration.
So, whether you're a seasoned pro or just starting out, let's dive into the world of Jenkins Shared Libraries and see how they can make your life easier.
Jenkins Shared Libraries play a crucial role in the realm of Infrastructure as Code (IaC).
So, what are they exactly? Think of Jenkins Shared Libraries as your secret stash of code snippets, neatly organized and ready to be plugged into your pipelines whenever needed.
Let's explore the aspect of reusability within Jenkins Shared Libraries:
Reusability is the cornerstone of efficiency in software development, and Jenkins Shared Libraries excel in promoting this principle.
Imagine you've crafted a pipeline for executing your test automation suite, complete with parameterized options for test suite type, target device/platform, environment, and concurrency. You've also developed a versatile runner method capable of translating user parameters into actionable commands for initiating test runs.
Now, consider the scenario where you want to set up a nightly execution or integrate additional functionalities into your pipeline. Rather than starting from scratch or duplicating code, you can encapsulate the existing functionality, including the runner method and parameter handling logic, into reusable components within the Shared Library.
However, the benefits of reusability extend beyond just code consolidation. Think about the parameters themselves – they too can be exported to a shared library to avoid code duplication across multiple pipelines. This ensures consistency and standardization in how parameters are defined and utilized across different projects.
Moreover, let's not forget about the environment in which you want to initiate your test runs, whether it's a Sandbox, Staging, or Production environment. Setting up the environment for testing often involves specific configurations and prerequisites. Instead of reinventing the wheel for each pipeline, you can define the environment setup logic within a method shared across your organization, ensuring uniformity and reliability across all your pipelines.
In essence, Jenkins Shared Libraries empower you to build a library of reusable components, enabling you to efficiently develop, maintain, and scale your automation infrastructure.
But enough with the chit chat let’s get busy and see how we can turn these buzzwords into action…
For this demonstration, I'll create a very simple and primitive Jenkins pipeline to illustrate our requirements outlined earlier.
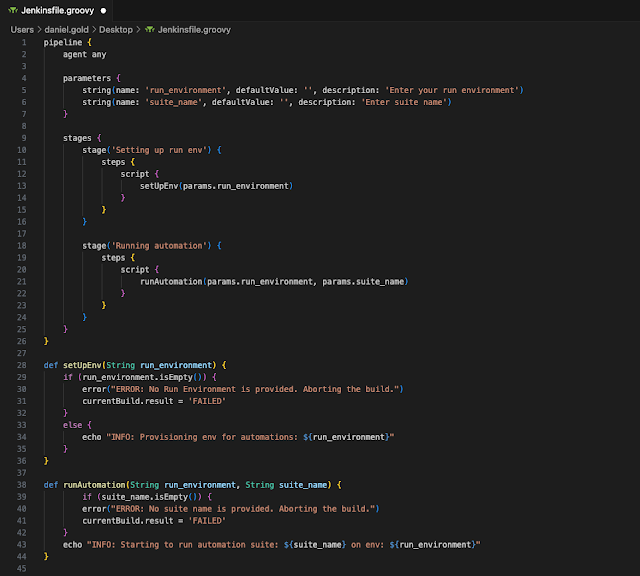
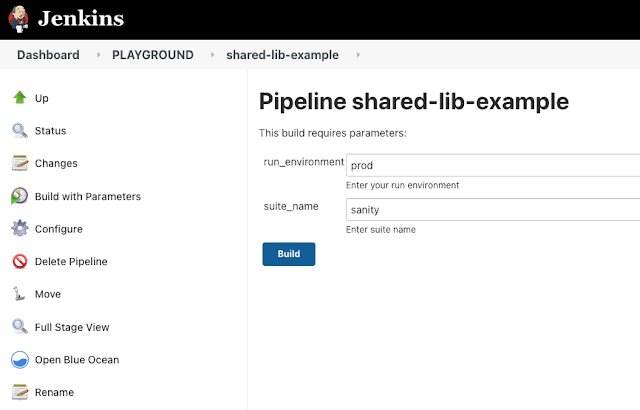
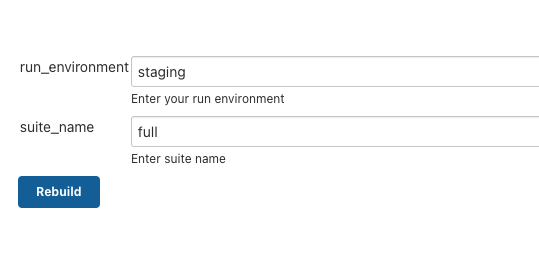
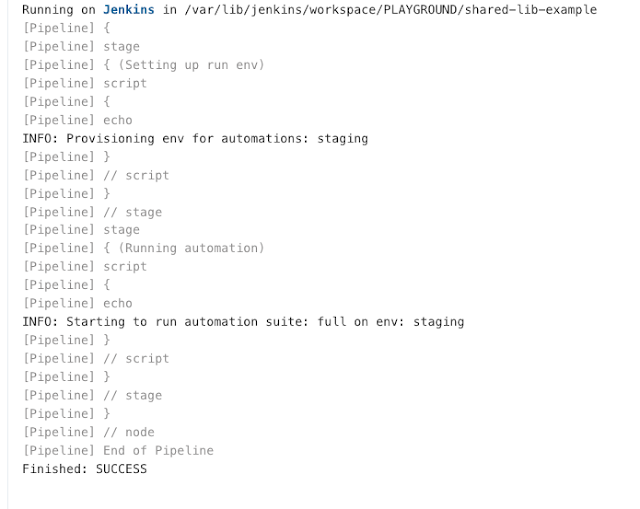
As you can observe, our pipeline accepts two parameters: "Run env" and "Suite name."
The pipeline will dynamically provision the environment based on the user's input and proceed to execute the specified automation suite in that same environment.
I will push my Jenkinsfile to my GitHub repository and configure my Job to pull from that CSM.
Now, let's give it a try.
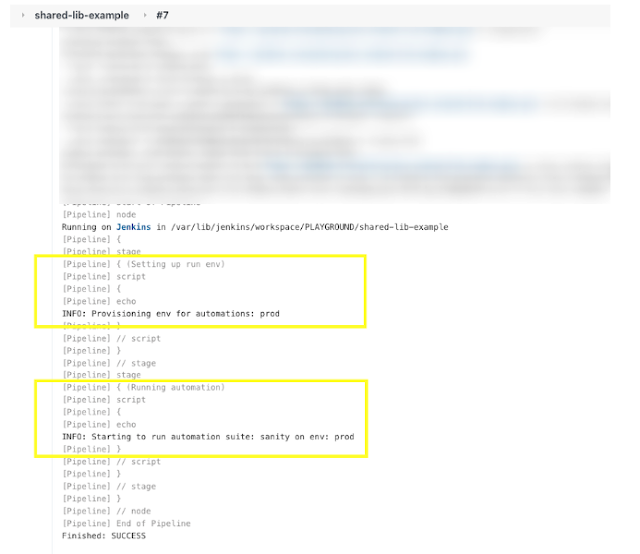
And there you have it… it works seamlessly.
Now, as we've discussed, I aim to make the code responsible for environment provisioning and test execution reusable and maintainable. I intend to consolidate it in a single location accessible to all other pipelines.
I will create a new class called 'Automation' to house reusable methods applicable to various pipelines. This class will serve as a repository for commonly used functions, enhancing code organization and promoting code reusability across projects.
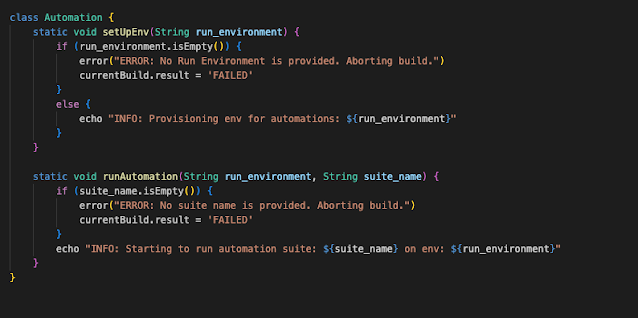
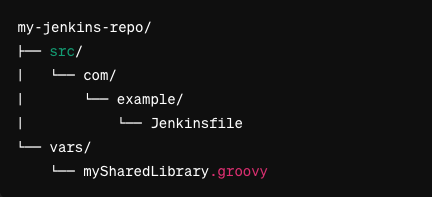
Once the 'Automation' class is finalized, I'll upload it to GitHub. Here's the intriguing part: the 'Automation' class can reside in the same repository as my pipeline scripts, following a structured approach like this: [image of directory structure].
Alternatively, it can exist in a separate repository dedicated solely to shared libraries.
Obviously, we can extract the parameters as well if we know they would be reused across multiple pipelines.
In my case, I've chosen to set up a separate repository exclusively for shared libraries.
This choice offers improved organization, scalability, and accessibility. By housing shared libraries in their own repositories, they become readily accessible to anyone looking to create pipelines or incorporate similar functionalities across my organization.
For example, if tomorrow we are asked to incorporate automation execution as an integral part of the CD pipeline, we can easily do so seamlessly.
Next, I need to configure the library in Jenkins.
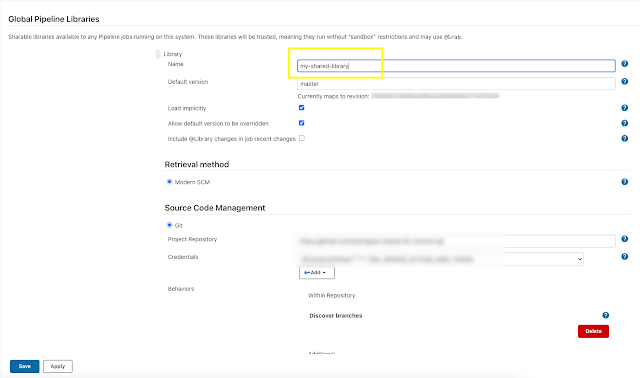
To configure the shared library in the Jenkins UI, follow these steps:
- Go to "Manage Jenkins" -> "Configure System".
- Scroll down to the "Global Pipeline Libraries" section.
- Click on "Add" to add a new library.
- Provide a name for the library.
- Enter the repository URL, for example, https://github.com/myrepo/my-shared-lib-repo.git.
- Optionally, specify a default version to use.
- Add appropriate credentials if the repository requires authentication.
- Save the configuration.
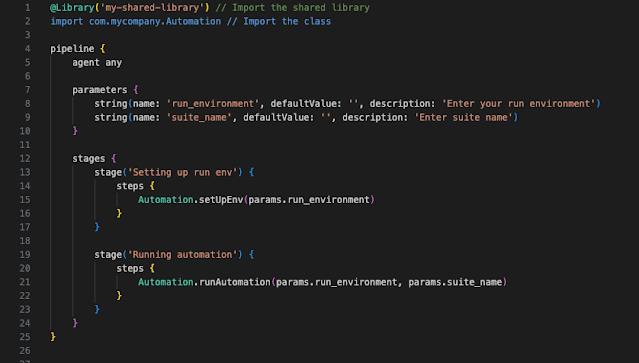
As you can see after my changes, I am requiring the library to use the name I gave it in the “Global pipeline libraries” management screen. Below that I am importing the relevant class that contains the methods I need for this pipeline. (Automation class)
In the pipeline itself - I am now calling the static methods setUpEv and runAutomation
from the shared library instead of invoking the ones we had inside the Jenkinsfile itself.
Now let’s run it and see if it works…
I guess it does… Now, it's your turn to try it. :)


Comments
Post a Comment